Help > Configure Google Analytics
These set of instructions assume that you have a Google Analytics account. To create an account follow this link.
-
Once logged into Google Analytics, you will need to create three custom dimensions. To peform this activity locate the admin icon (gear icon) as shown in image provided below.
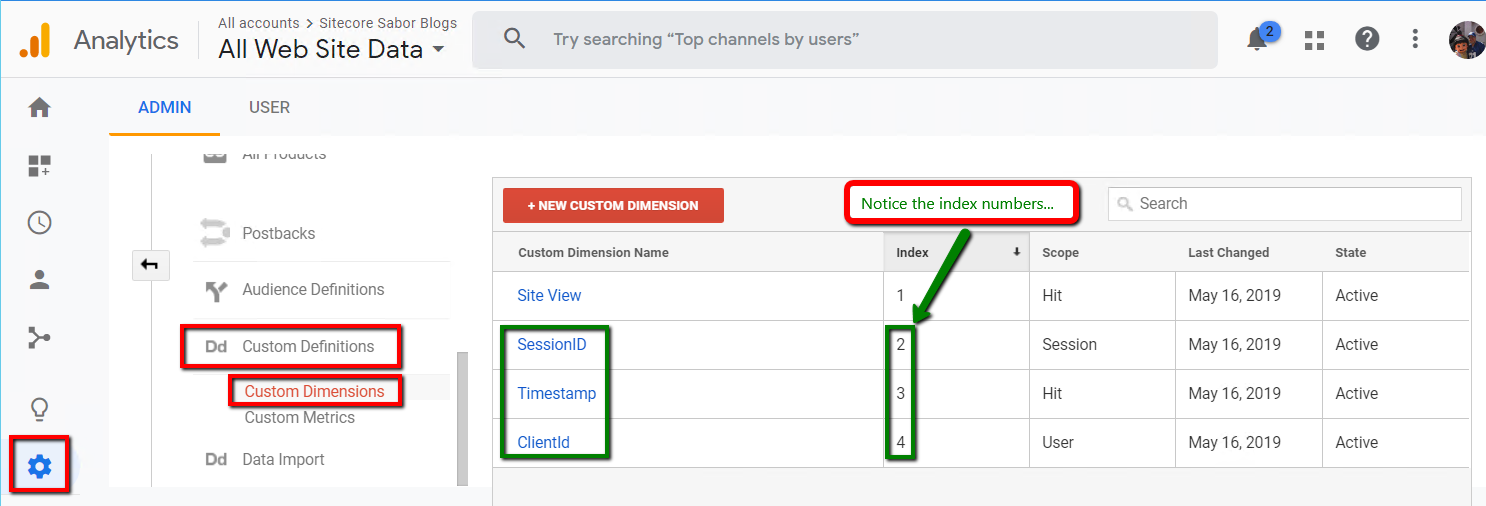 Afterwards, navigate to Admin > Property > Custom Definitions > Custom Dimensions as shown in the above image. Create the following custom dimensions provided in the next sub list and highlighted in the image. Take note of the dimension index number of each as they will be needed in the steps to follow.
- Name: SessionID
Scope: Session - Name: Timestamp
Scope: Hit - Name: ClientID
Scope: User
- Name: SessionID
-
If you apply Google Analytics using Google Tag Manager, you must go into GTM and do the following:
-
Create three custom variables through the Variables > User-Defined Variables menu command as shown in the image below...
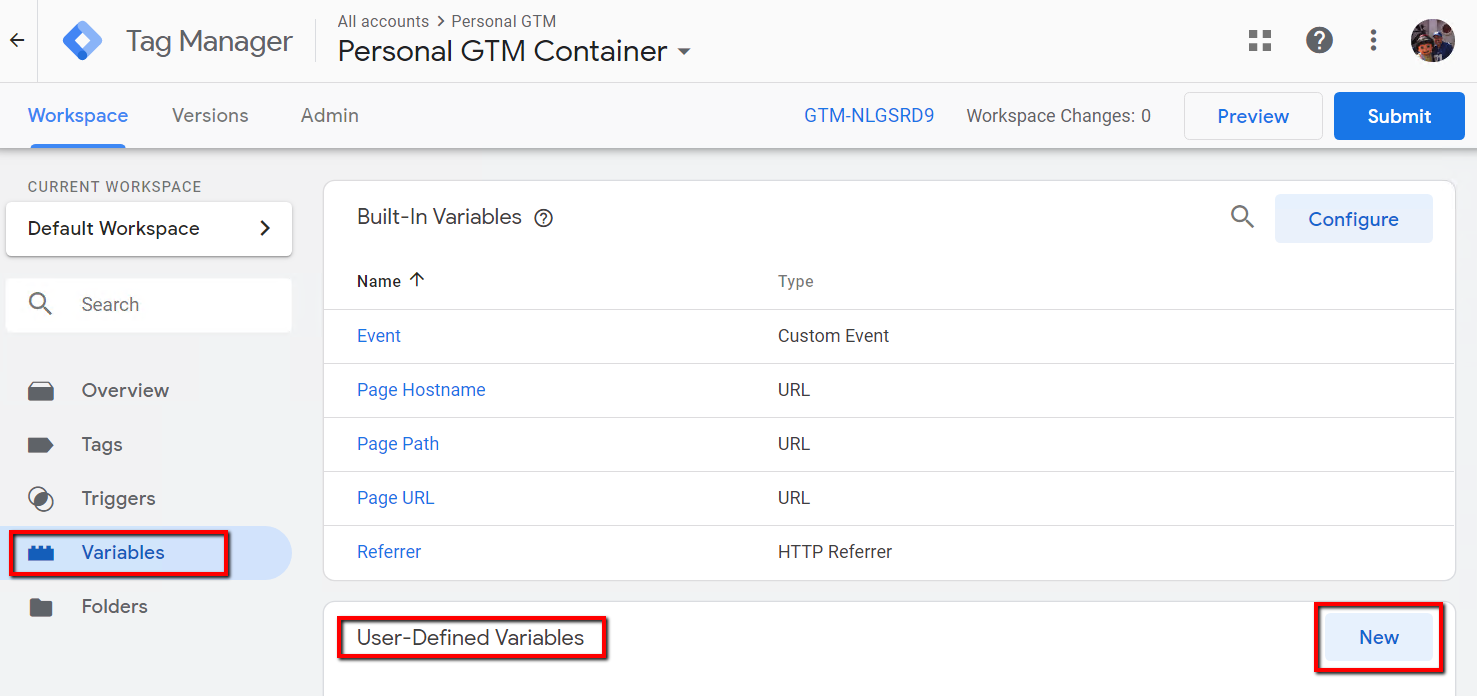 The three variables to create are listed below...
-
Name: DataInsightsSessionID
Variable Type: Data Layer Variable
Data Layer Version: Version 2 An image displaying the development of this variable is shown below for reference.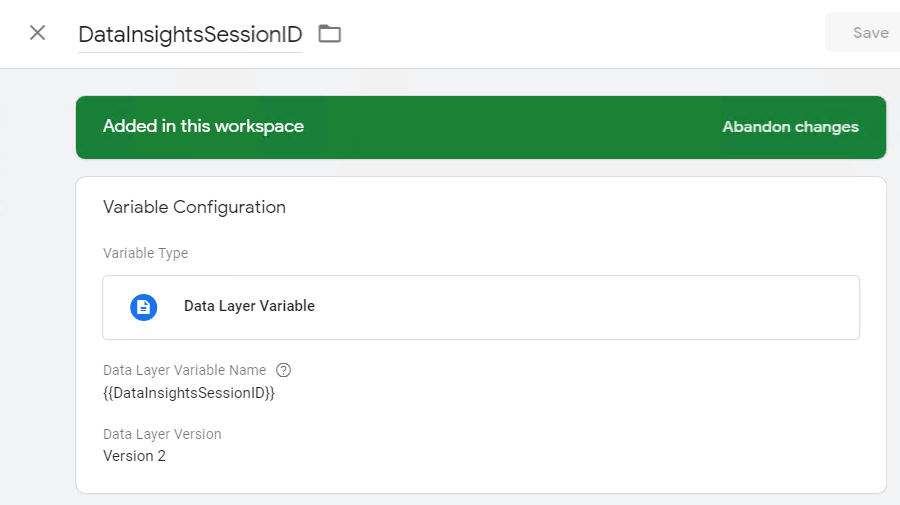
-
The second variable is configured like the first with a different name so the previous image can still be used as a reference point. Use the configuration information provided below.
Name: DataInsightsTimestamp
Variable Type: Data Layer Variable
Data Layer Version: Version 2 -
The third variable is configured differently form the first two and involves injecting javascript. An image is provided below which demonstrates configuring this variable.
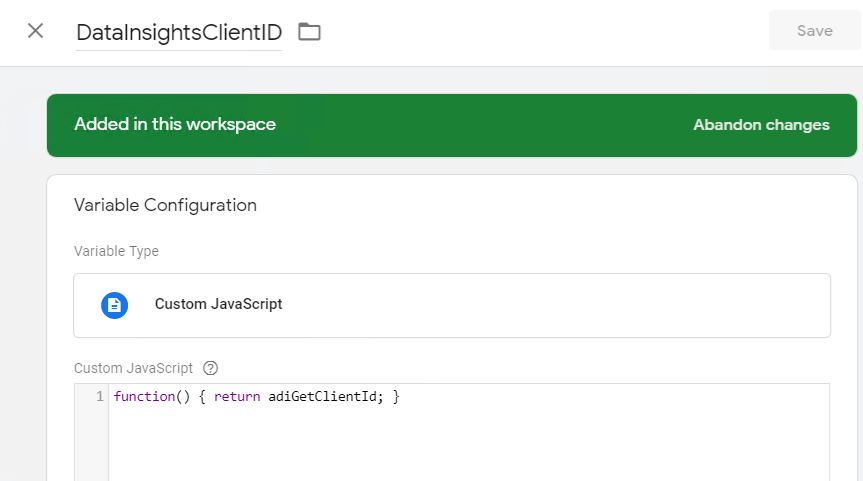 Name: DataInsightsClientID
Variable Type: Custom JavaScript
Custom JavaScript: function() { return adiGetClientId; }
Data Layer Version: Version 2
-
Name: DataInsightsSessionID
- We need one more custom variable. This particular variable will reference the first three created in the previous step and be directly referenced by the custom tag created in the next step. An image of how this variable is defined in shown below.
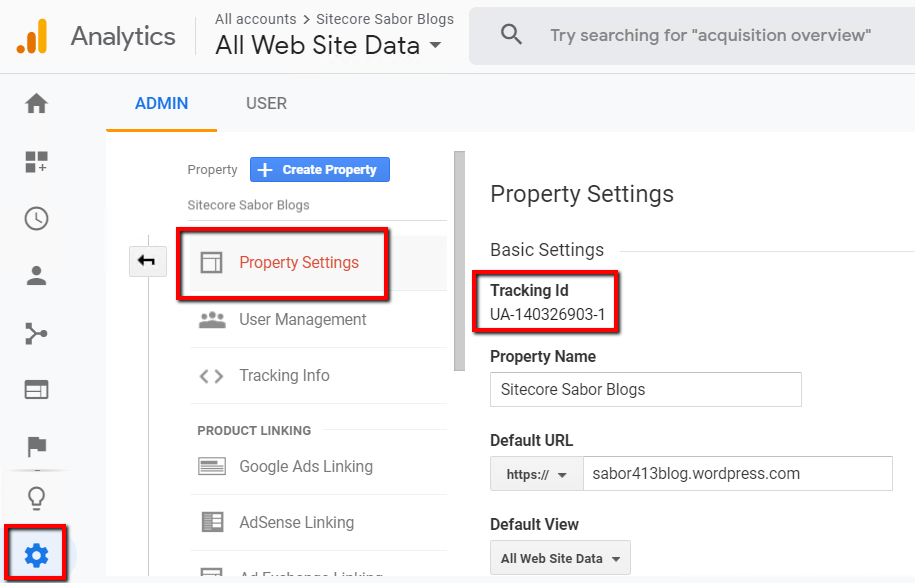
 Note that you must provide the Tracking Id generated by your Google Analytics account. An image of where to find this Id is shown below.
 The next step is setting references to the custom variables created previously. While editing this new variable, navigate to the "More Settings" section to add those references as shown in the image below...
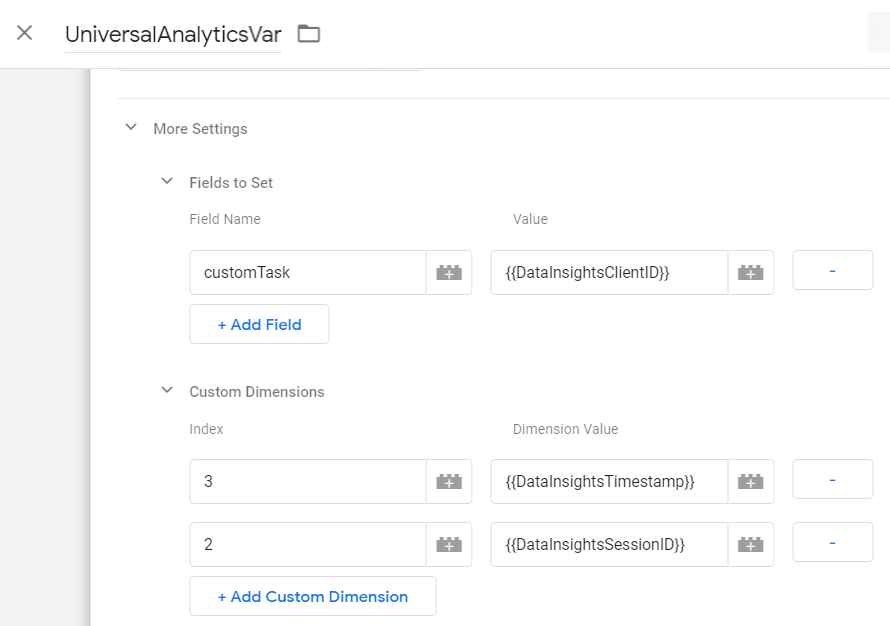 Under More Settings > Custom Dimensions add the following entries...
-
Index: Your custom dimension index for SessionID
Dimension Value: {{DataInsightsSessionID}} -
Index: Your custom dimension index for Timestamp
Dimension Value: {{DataInsightsTimestamp}}
-
Field Name: customTask
Value: {{DataInsightsClientID}}
-
Index: Your custom dimension index for SessionID
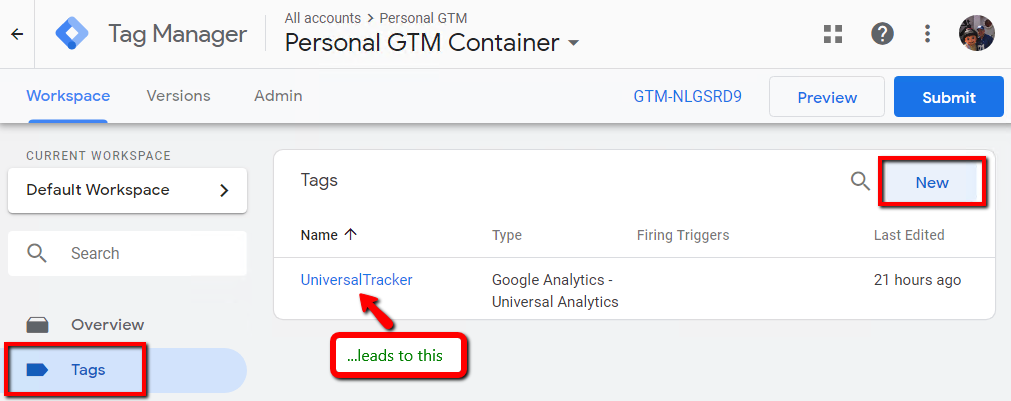
- The next step is to create the Tag element referencing the last custom variable made which in turn references the other three variables. If you follow the image below, navigate to the Tags section and click the New button.
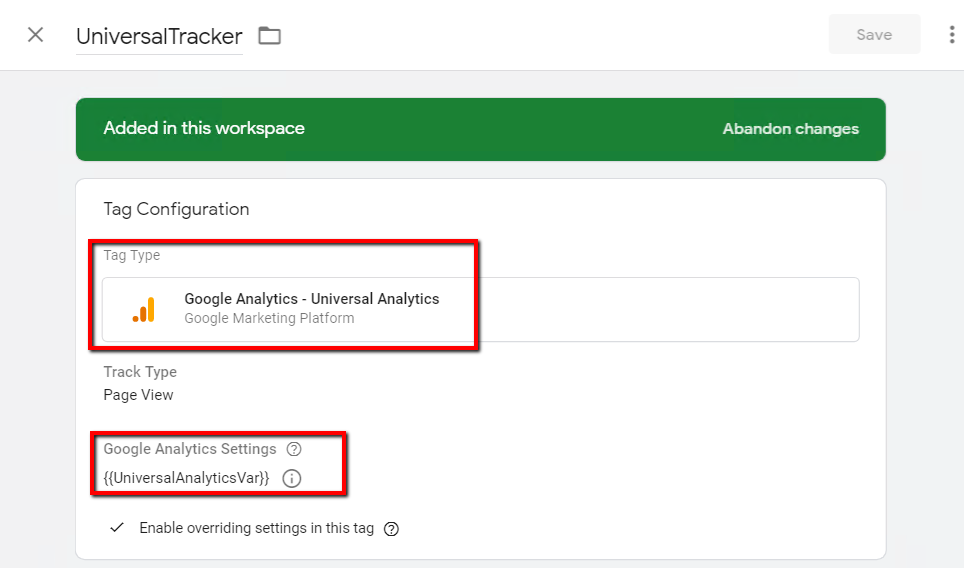
 When creating this tag, assign the fourth custom variable which references the other three. The finished tag is shown in the image below.
- Save and publish your GTM changes
-
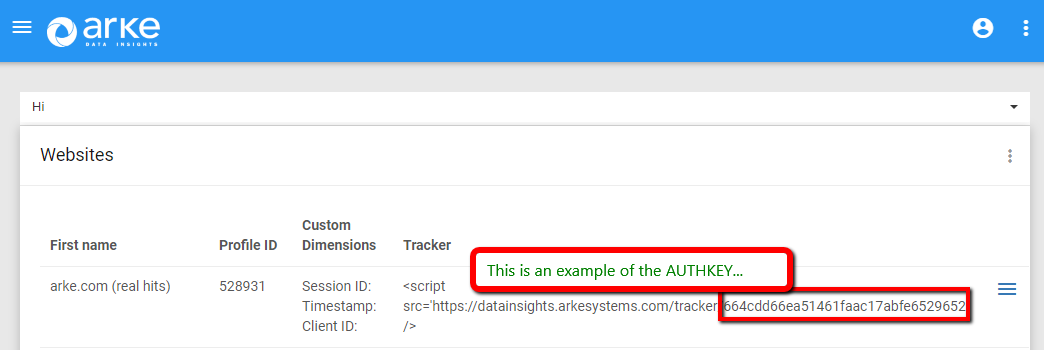
In the next step, what is needed is the authorization key. An image of where that key can found for the proper website is shown below.
 Tags > New > Custom HTML
<script src='https://app.gettrackable.com/tracker/gtm/<AUTHKEY>' defer />
Set this tag to run before the Universal Analytics tag.
-
Create three custom variables through the Variables > User-Defined Variables menu command as shown in the image below...
- The following analytic tracking mechanisms are in beta version at this moment, but it should work. The next two steps below outline how to set this up for those mechanims. If you run into issues, please e-mail us at support@gettrackable.com.
-
If you use Universal Tracker but not Google Tag Manager, add the following script to your website:
<script src='https://app.gettrackable.com/tracker/gtag/<AUTHKEY>' /> -
If you use Google Analytics Classic but not Google Tag Manager, add the following script to your website:
<script src='https://app.gettrackable.com/tracker/ga/<AUTHKEY>' />